
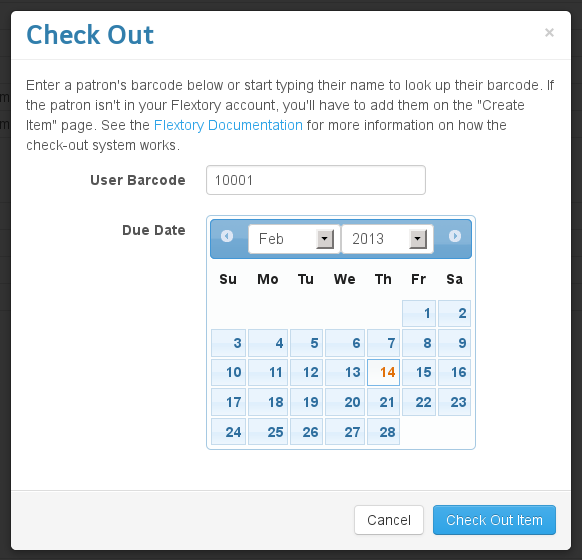
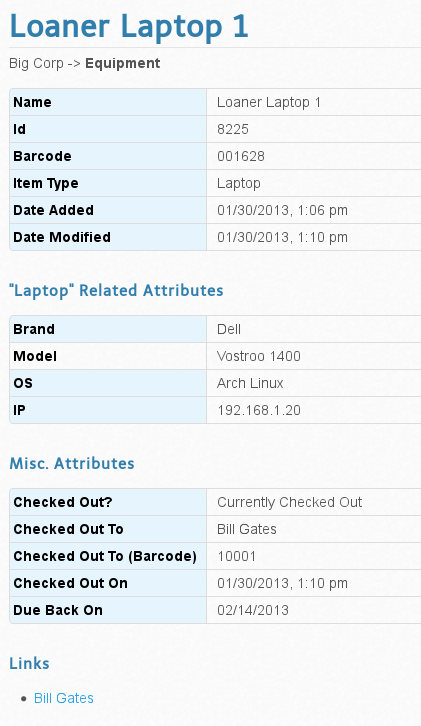
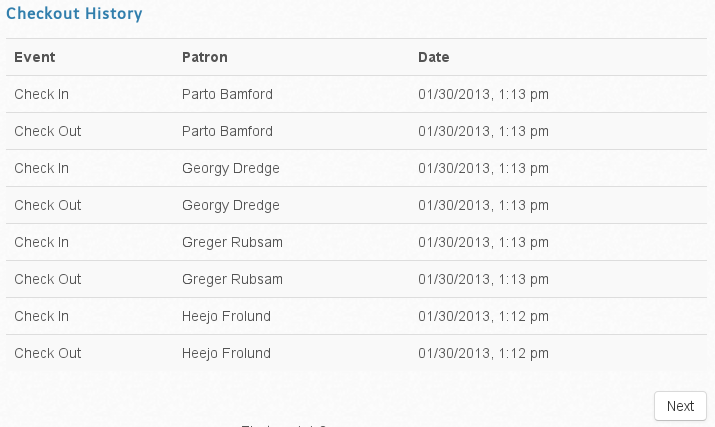
While it has always been possible to manually keep track of which items are checked out or in in Flextory via the use of custom attributes, there now exists a more streamlined way of handling item checkouts. Once the Checkout module is enabled, you can simply check out an item by clicking the “Check Out” button when viewing an individual item. From there, you can type in a patron’s barcode or start typing their name to perform a search for the patron. After that, you select a due date and then click “Check Out Item”. Flextory will automatically create attributes to keep track of the checked out state of an item and log the check out event and list it under “Checkout History”.
Flextory also keeps with it’s philosophy of being flexible by allowing you to create and organize your patrons/users however you want and give you the ability to check out any item in your Flextory account. A patron is just another item in Flextory and whatever is in the Name field of the item will be what is used for all the checkout details. You can find more information on how the Checkout Module works at http://flextory.com/docs/checkout_module.
The Flextory Checkout Module will be of great use to a variety of users. IT departments and small businesses may wish to checkout equipment such as laptops, cameras, etc. to their users. It would also work very well for checking out books in a library. Finally, since you can organize patrons and items however you want, Flextory users may find other uses that are more unique and customized to their particular problem.
Check out some of the screenshots of the new module below, and be sure to get in touch with Flextory Support at [email protected] if you have any questions or need any gudiance on how best to handle equipment checkouts for your business or organization.

Recent Comments